Getting started
Three steps, about five minutes. You need Google Chrome or Microsoft Edge.
1. Install BC Buddy
Open BC Buddy in the Chrome Web Store and click Add to Chrome. Edge first asks whether to allow extensions from other stores; say yes.
The BC Buddy settings page opens by itself. You can leave it open for step 3.
Finding BC Buddy later
Click the puzzle piece in the browser toolbar and pin BC Buddy. From then on, one click on its icon opens the settings page.
Business Central has a way in too: click the gear icon at the top right and choose Settings under BC Buddy.
2. Open Business Central
Open Business Central, or reload a tab where it was already open. Without any setup, it is now easier to work in:
- Copy values. Rest the mouse on an amount or a No. in a list and click the small copy icon.
- Wide pages. Every page uses the full width of your screen, with its action bar pinned, and tile pages show as a list.
- Bigger dropdowns. The list under a field shows all its columns.
- Week numbers in the calendar of a date field.
- The line you are on in a journal or order stands out.
- No notifications bell at the top right.
Do not like one of them? Switch it off under Web client on the settings page. More about each improvement.
3. Give your environments a colour
Most companies have a Production environment, where postings are real, and one or more test environments, often called Sandbox. They look exactly alike. BC Buddy gives each its own colour, so you always know where you are.
On the settings page, go to Environments:
- Click Add rule and type a name, such as
PRODUCTION. - Under Conditions, choose Environment and equals, and type
Production. - Pick a colour: green, for example.
- Click Add rule again for your test environment: name
SANDBOX, Environment equalsSandbox, in red.
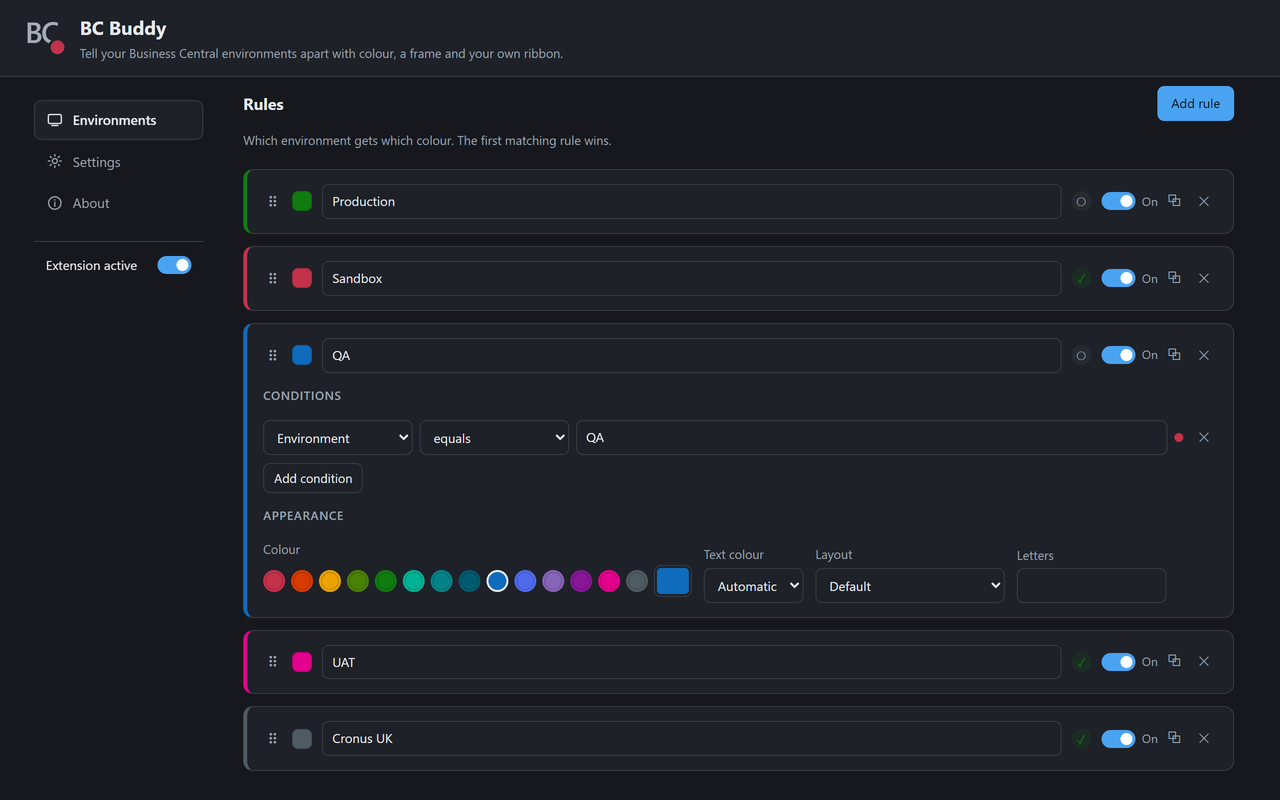
Now switch to your Business Central tab: the bar at the top shows your colour and a coloured frame runs around the window.
Not sure what your environment is called?
At the top of Environments, click From open tab. BC Buddy reads your open Business Central tab and shows the name of the environment and the company. A green tick on a rule means it fits that tab.
Does your team already use BC Buddy? Ask whether there is a shared file: then you get everyone's colours in one go. See Sharing with your team.
Want more?
- Web client: what each improvement does, and how to set it.
- Rules: a colour per customer or per company.
- Layouts: a banner, your own text, a marked browser tab.